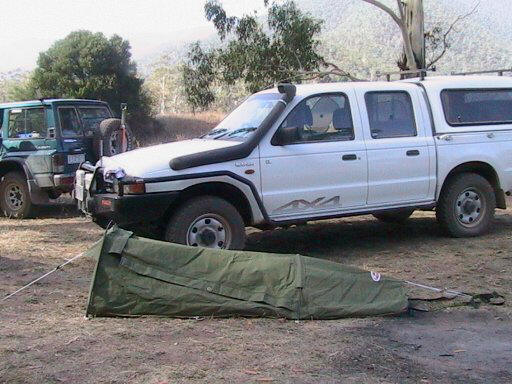
Dave's
'02 Dual Cab
Courier
2.5l turbo diesel
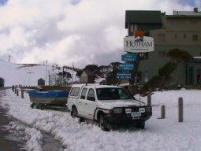
Off to the beach......not that you'd guess.
Shep - Merimbula via Hotham - Nov '03
Ford Courier 2002 2.5ltr Turbo Diesel Dual Cab
(some items listed below have been removed prior to sale.)
Bars & Stuff
ARB Winch Bar - modified to take hi lift adapter
ARB Sidebars/steps
XD9000 Winch (see link below for servicing info) - mod'd to run from dash
switches
TJM Airtek Snorkel
Hayman Reese rear bar & step - now modified to stop bending the
corners
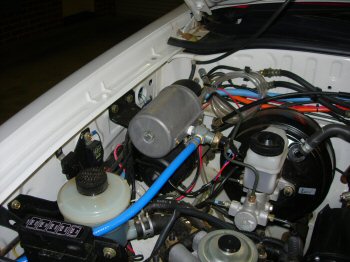
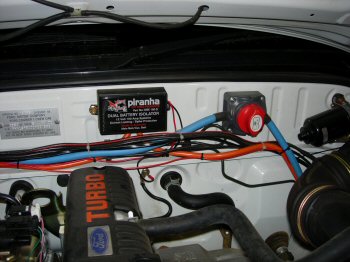
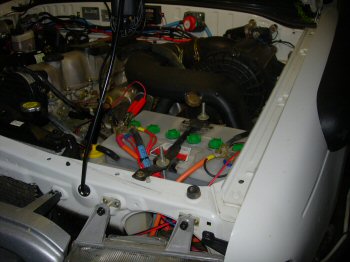
Electrics, Air & Water
Piranha Dual Battery System with self built voltage monitor -
pics
ARB Compressor &
air connect on bull bar - pics
Glind Shower - pics
25 ltr side storage tank in back
IPF lights & stays
Imobiliser & Central Locking
12v sockets on bullbar, O/S on canopy & in back
NEW Tekonsha Prodigy Brake Controller - replaced
Voyager for the hell of it and to see how much better the Prodigy really is
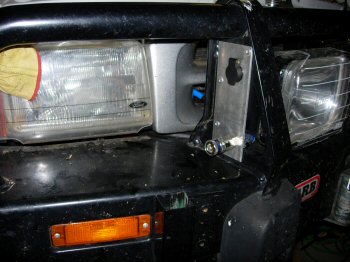
NEW Headlight wiring upgrade -
see pics and instructions.
Portable
DVD & 2 Headrest Mounted 7" Screens
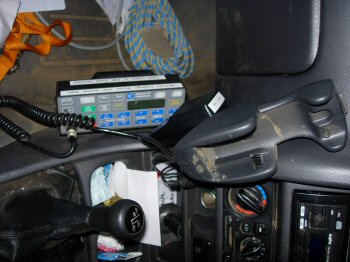
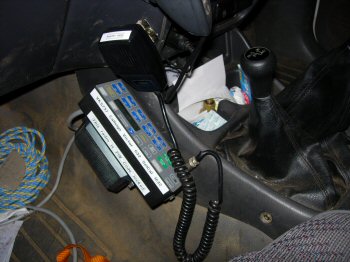
Communications
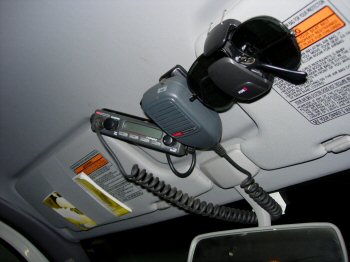
GME TX3400 UHF
CODAN NGT AR HF & 9350 Autotune
Motorola 9500 Iridium Satellite Phone
(VKS737 callsign V1632 SelCal 1632)
Navigation
Magellan Meridian Platinum (for 4wd touring & geocaching)
HP IPaq hx4700 Pocket PC (OziExplorer & Navman with Haicom Bluetooth GPS) for
mapping & MP3 playing.
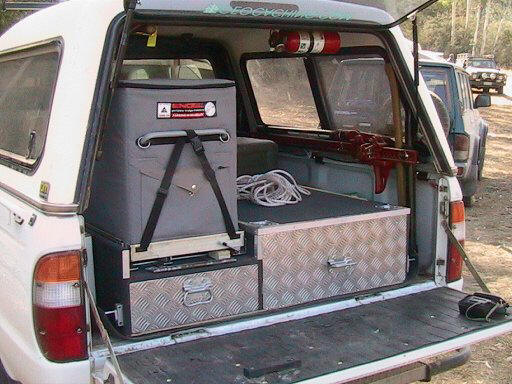
Storage
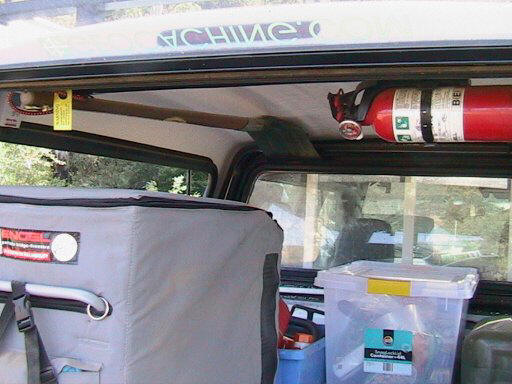
TJM Canopy
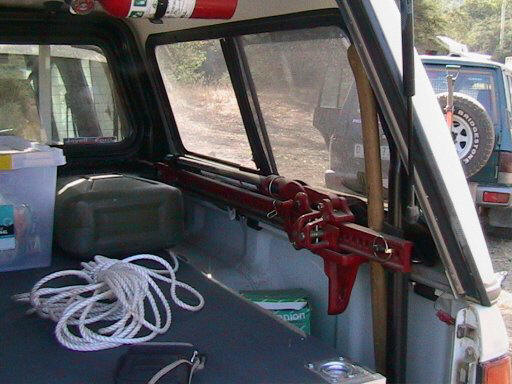
Self built roof bars & internal bar work - mounted with Shovel & HiLift Jack
inside canopy. Sailtrack canopy from vehicle side for shelter full length of
vehicle.
Rod tube replaces awning as required
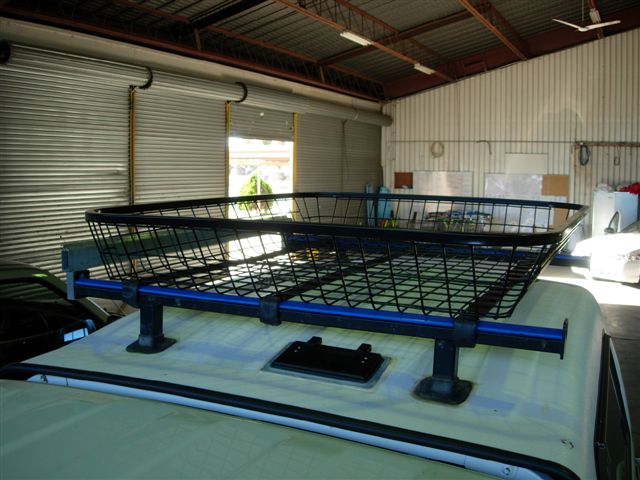
Self built roof basket
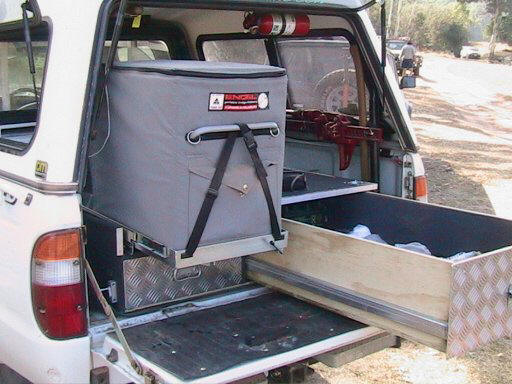
Own built drawers & fridge hinge
(for shorties)
Engel 40ltr fridge
Other stuff...
Cooper Discoverer ST's - I love them
Finer Filter
Can be seen towing either:
Stessl Edgetracker HD 3.85 with 30Hp Tohatsu & custom fit out by me.
Pics to follow soon...
the Kanga Big Red (www.kangacampertrailers.com.au)
My Projects
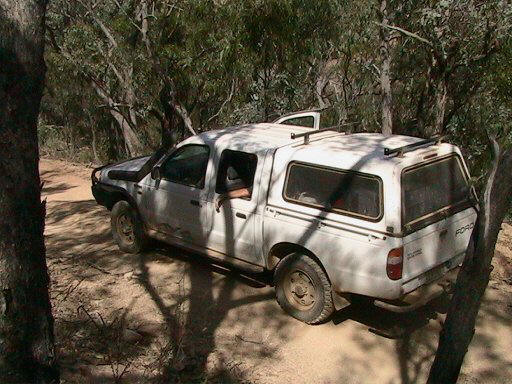
Got bored yesterday and decided to do something I've been meaning to do for a while. Driving home from the Border Track trip last weekend I was lamenting the lights quality and colour. They seemed dim and a little yellow. That might have had something to do with having had to wash half of Toolangi out of the lenses after the excursion in the top photo on this page in the past but I decided to investigate the wiring.
You can see what sort of difference upgrading the wiring is going to make fairly easily with a couple of lengths of wire and a multimeter.
The connector on the back of the normal headlight globe on a standard hi/lo 60W/55W globe has three pins.
Using a multimeter or test light work out which pins on your globe are high, low and ground (-ve).
Measure the voltage at the high and low pins with the lights on either setting with the engine off with respect to the battery negative terminal. Then measure the battery voltage.
Mine were as follows:
High 11.45v
Low 11.53v
Battery 12.7v
You can see that the voltage to the lamps is
substantially lower than the available supply.
If you actually measured the voltage from the ground pin on the lamp back (mines
a bugger to get to) to the relevant light supply terminal you'd probably find it
lower again as you would lose a similar amount in the ground return wire.
A 10% drop in supply voltage to a 12 v headlamp globe equates to something like a 25-30% decrease in light intensity.
To demonstrate try using a wire offcut to jumper between the battery +ve terminal and the light high or low while they are on and see the light get brighter. Do the same for the ground terminal and see it increase further.
It's easy to fix.
1. Take a 6mm (approx 4.5mm²) feed to a fuse block capable of holding at least 2 fuses from the +ve battery terminal.
2. From each fuse supply that feed via 4mm cable to pin 30 of a Bosch style relay. One will be your high beam and one will be your low beam relay.
3. Run a 4mm lead from both pin 87's on each relay. From one relay go to left low and right low pins on your lights. From the other relay go to left high and right high pins on your lights. You can either plug into your OEM plug or cut it off and join it. If you leave the factory plugs on you can pull it all out and go back to standard and reuse your bits on a new vehicle if you can be bothered.
4. Run a 4mm ground wire from the common pin on each light to the battery earth point - often on the inner guard near the battery.
5. Run a jumper from one of the original light socket for each relay. Remember which was which. From the high +ve on the light socket to the pin 85 of the new high beam relay, and from the low +ve on the light socket to pin 85 of the new low beam relay.
6. Pin 86 of both new relays goes to ground (anywhere will do.)
7. Neaten up with cable ties and test. For interests sake remeasure with the multimeter but you will already be able to see the difference.
Pics below of mine.
Material required
2 x 30Amp Bosch relays (type with pin 30, 85, 86 & 2 x 87's - not 87/87a) -
about $5 each or possibly in your junk boxes like mine.
2 x H4 headlight sockets and crimps - $6 at the local auto elec
Off cut of aluminium angle to mount relays on
2 fuse holders (mountable) or a fuse block.
Assorted insulated female blue crimps, a few yellow ring terminals and some blue
males.
Offcut lengths of 6mm wire
About 5 metres of 4mm twin (sheathed is nice)
Roll of quality tape and cable ties
Good quality crimping tools - don't cut corners and buy supercheap crap.
About an hour
1 - 2 cans of Bundy & coke
All up about $10 - $15 plus drinks.
7" Screen
mount for head restraints.
(for generic screens eg. Strathfield Luminaura DVD Player & 2 Screen Combo)
|
|
|
|
|
|
|
|||
Cost: $16 for the pair.
Time: 1-2 hours including thinking & drinking time
Material: 38mm x 3mm flat - about 1.2metres
30mm x 3mm flat - about 0.5metres
4 x 16mm IP68 Cable Glands (Electrical wholesaler) $10
Will need 16mm drill bit, hole saw or ideally a step drill
- if you don't have a step drill you'll never regret buying one.
Welder
Instructions
1. Work out the distance from the legs on the head rest
back to a point level with the headrest back.
2. Bend 38 x 3 flat steel a bit toward the short end at that point to about 95°.
(About 6mm to allow for radius)
3. Neaten end facing back of your head to nice round edge.
4. Drill 16mm hole about 15mm from end you just rounded.
5. Put cable gland in hole.
6. Slide onto head rest with what will be top facing away from headrest (so you
don't mark it or get
weld on it and melt it and make your
wife really cross...)
7. Bridge top of two pieces of 38mm with 30 x 3 flat, ON THE SIDE OF THE 38mm
THAT WILL EVENTUALLY FACE THE FRONT. This creates a 3mm depression to take the
mounting slide.
8. Drill 6.5mm hole in middle of 30.3 flat
9. Make a short piece of 30mm flat with about a 15-20mm right angle at the
bottom. Radius end as before.
10. Work out where bottom threaded hole on screen will sit and drill 7mm hole to
take 1/4"
retaining screw.
11. Work out length of support to allow back bolt to slide nearly all the way in
to screen mount
and bottom out on the rest.
12. Cut at that point and butt weld onto 30 x 3 cross piece in exact centre.
Tack and check screw
positions on back and bottom. If
right weld it on.
13. Clean up welds and mount to check.
14. If all good clean up and give it a coat of matt black paint (so it blends in
to the background.)
Dave's Drawers, and the infamous tilting fridge slide he should have patented....
|
|
|
|
|
|
|
|||
DOWNLOAD DRAWER PLANS
For
pdf file on construction of drawers and fridge slide click here to download
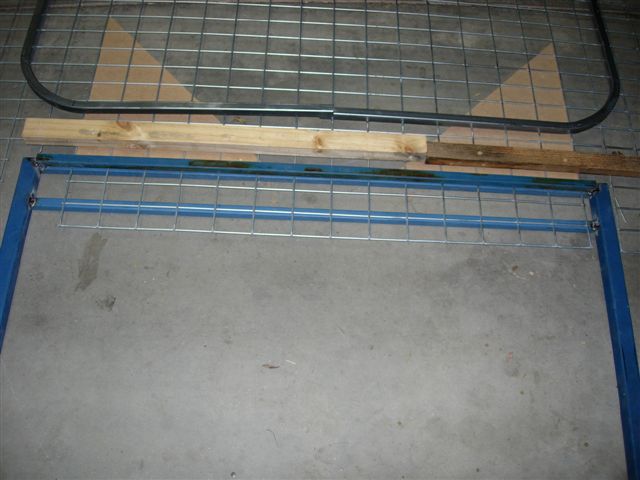
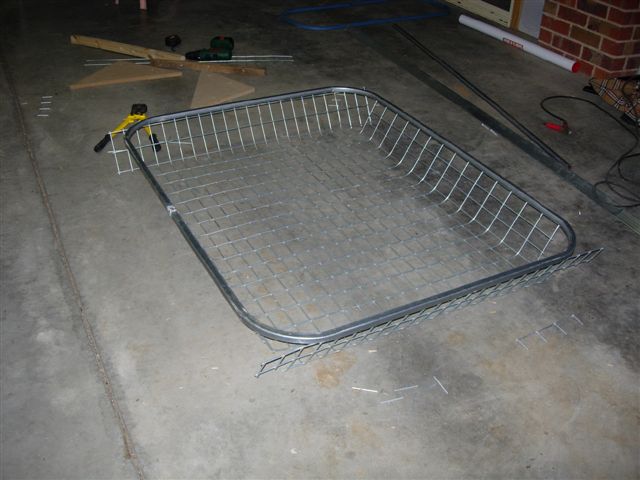
After considering all my options and looking at various brands and exorbitant prices I decided to make my own.
Mesh 2400 x 1200 $22
RHS (Gal) $15
Scrap RHS to make up mesh bender - scrap bin in shed
Flat for brackets $6.75
Powdercoating $60 (would have been $10 to paint but I wanted it powdercoated)
Rolling RHS corners $25
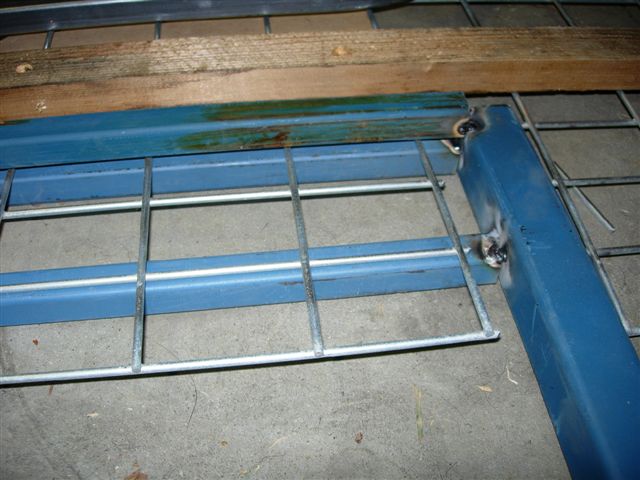
The first challenge was bending the mesh. No-one who bends sheet metal will put mesh in their bender as it chips the blades, unless they have an old bender out the back for these sort of jobs. So I made my own.
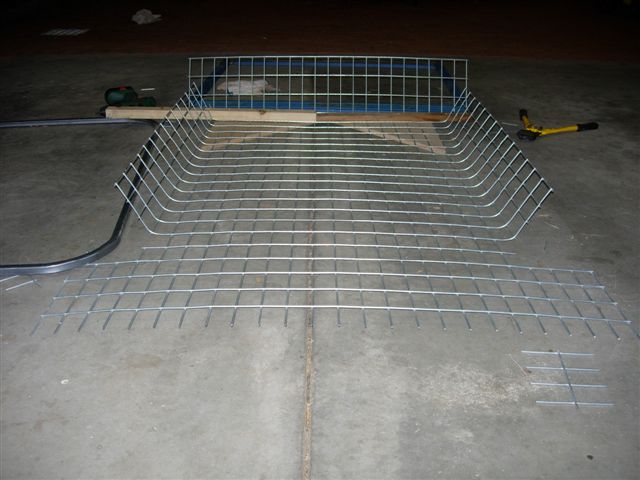
I cut corners out of the mesh (sheet already cut to size) and bent the four sides up. The base was clampe between two bits of timber to ensure a straight bend. Then sides bent up to about 60° to meet basket top ring. (75mm offset from base to top.)
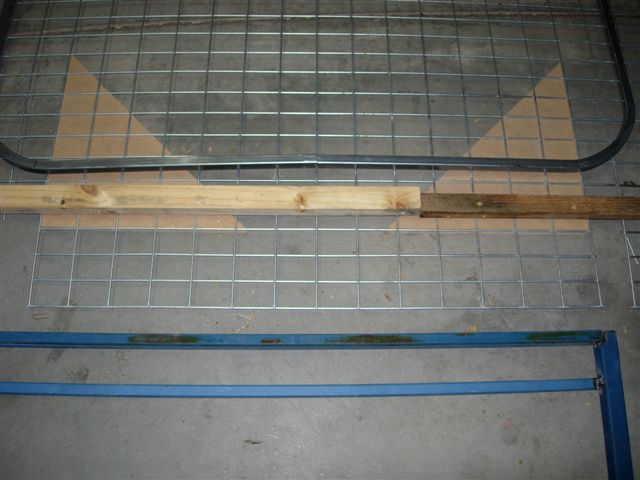
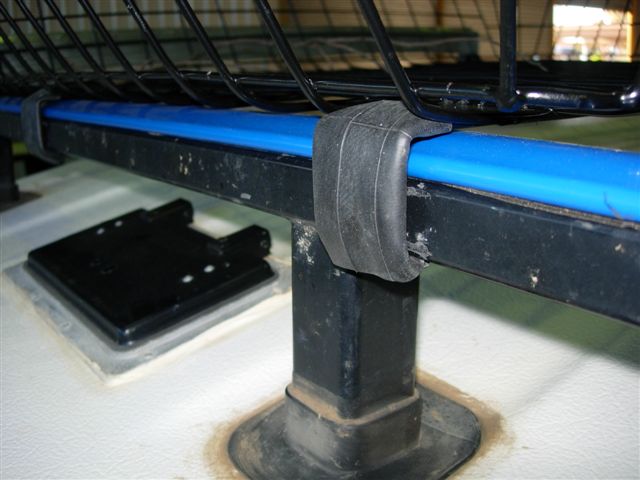
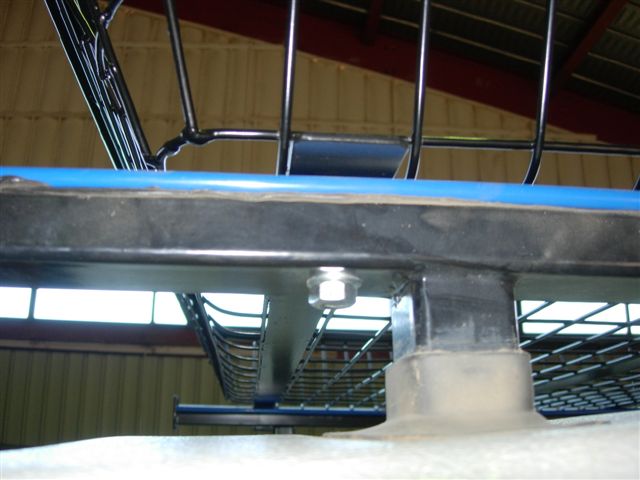
Once four sides bent, basket tacked to rectangular ring with arc welder and taken around to Wayne to abuse his generosity and his MIG. He kindly (being unable to leave an easy job without making it harder in the interests of a better product,) built the corners in out of scrap rod. With flat welded to the base and hooked at the front to wrap around the roof bars, all that was left to do was drill the securing bolt holes and clean up with angle grinder & wire brush.
Then off to the powder coaters, two days later it's now on my roof. A few hours in the shed (less than 2), a bit of thinking (drinking) time and about $120 and it was done, and it was good. See pics.
 Mesh bender slides over mesh then lever up to bend |
|
|
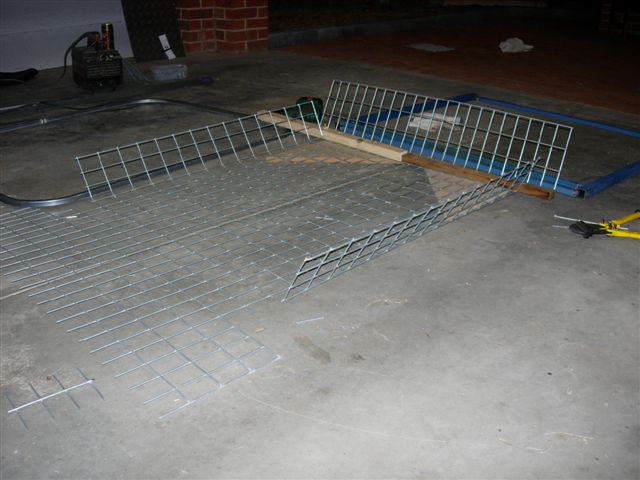 Three sides done |
 |
 |
 |
 |
 Hooks hold on front |
 Bolts hold at rear |
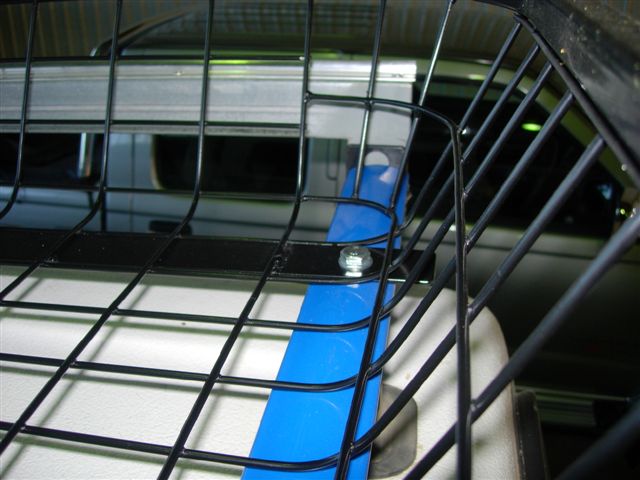 Nice corners - thanks Wayne |
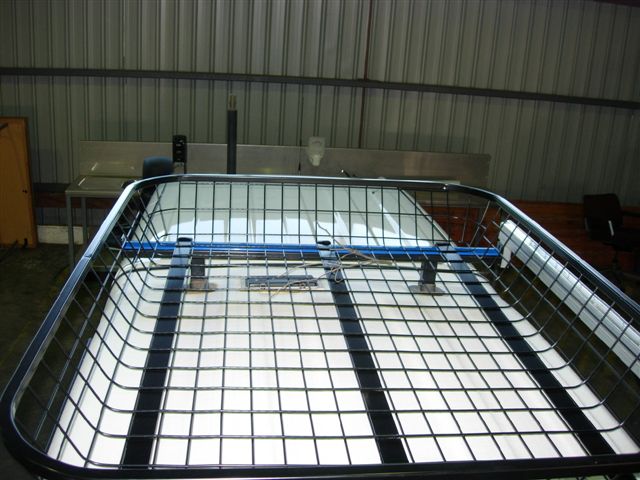 Finished product |
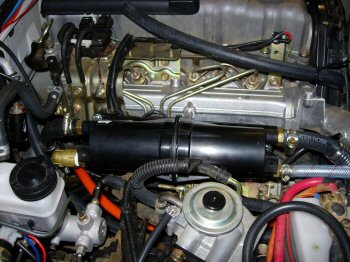
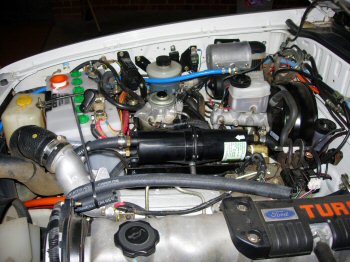
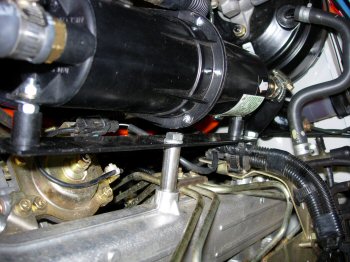
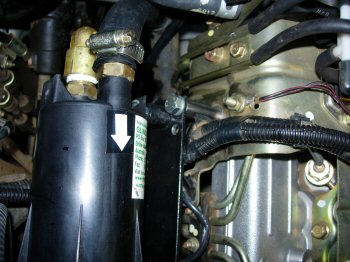
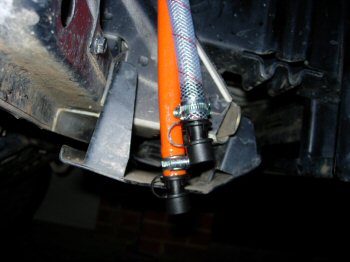
Glind Shower, ARB Compressor & Dual Battery System
|
|
|
|
|
|
|
|
|
|
|
|
|
|
|
.jpg)
.jpg)
.jpg)
.jpg)
.jpg)
.jpg)
.jpg)